2025-03-25
Apple to Linux Journal - Migrating from Apple Photos to digiKam
One of my first considerations in moving from Apple to Linux was photo management. I've moved my photo workflow to digiKam. And I'll say right up front, this is NOT the app for families that want to live in one large, shared photo library in a cloud. digiKam is for managing a local file photo library. I might work over a local network though I've not tried that.
One of the stickiest bits of the Apple ecosystem is iCloud Photos. Photo sync between devices has been perfect for me since I started using it. I take a photo with the iPhone and it syncs to all of my Apple devices within minutes. To this day it still feels like magic. Not only that, with machine learning working behind the scenes, the Photos app almost always successfully identifies the categories and specific names of the living organisms I tend to photograph. Insects, reptiles, trees, fungi, moss, lichen, almost anything is properly identified. This means if I search for fungi, frog, moss, butterfly or anything like that I get results through no effort of my own. Beyond that Photos identifies very specific identification allowing me to click right through to example photos from the web as well as a Wikipedia entry if the identification is for a living organism of some kind.
I was relieved to see that digiKam has face detection and recognition built in. More about this later. Unfortunately the app does lack some of the other machine learning features I've grown accustomed to, again, more about this later. DigiKam seems to be most recommended photo management app I've seen in the Linux world and after a few days of use I understand why. Fully featured, well designed and everything I've come to expect for this kind of app. Not only is it open source, it is available on Linux, Mac and Windows. Twenty years ago I used and became proficient in managing and editing my photos in Aperture and Lightroom, digiKam feels like that kind of app.
The migration process
Long before turning off iCloud photos I had set my Mac to download and keep an original copy of every file. I created a back-up of the Photo library on an additional drive as well. Now it was time to export all of that media into a structured folder system that would make sense and be useful as a starting point for future organization.
My first step in this process was to use the M1 MacMini running the Photos Takeout app to export all of my original photos and videos from the Photos library. It took 36 hours but eventualy I had a 130GB folder of my original photos and videos exported by Year>Month>Day. (Note: As I write this I'm days into the further steps of this process detailed below. It occurred to me well after this step that I should have taken more time before the export to take advantage of Apple's automatic machine learning to tag my files with keywords. For example, I could have searched for Fungi and then selected all the found images to add Fungi as a keyword. Same for bird, lichen, butterfly, flower or any of the other things I often photograph. Photos Takeout adds keywords to image metadata when it exports and digiKam reads that. It would have saved me a lot of time!)
Step two: Copy those photos over the network to an external hard drive attached to LinuxMini to serve as my new active Photo library. I'll keep the original Apple Photos Library as an archive. But my current plan is to work from digiKam on the LinuxMini going forward.
Step three: Use Grsync to backup the newly exported media folder to a second external drive.
Step four: Open digiKam and create a new Catalog. Set the media source for that catalog as the folder of exports on the external drive. digiKam imports the media. I left the default setting of digiKam to keep the actual metadata database of any Catalogs I create on the internal SSD of the LinuxMini.
Step five: I'm now in the long slow process of weeding out photos I should have long ago deleted. I've got lots of near duplicates where I need to just pick one and delete 3-5 others. As I go I'm also adding keywords/tags as well as captions. This step would have been much faster had I spent more time in step two but I'm well into it now decided that I didn't want to start over. Honestly, I'm taking it as an opportunity to rediscover and enjoy my photos as well as learn more about how to fully use digiKam.
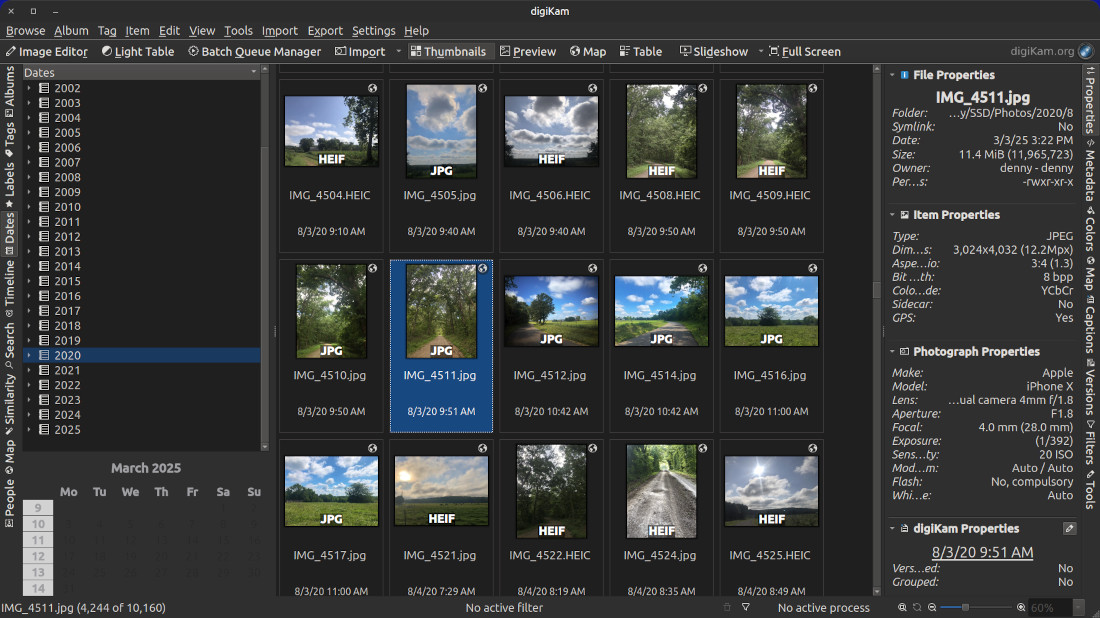
Overview of the application window with the left-side panel showing the dates tab for browsing images. The center consists of the image thumbnails and the right-side panel showing the images properties pane.
At this point in the process I feel pretty good about having a well organized photo library that is no longer trapped in a closed, propriety library format in an app that only runs on Apple devices. All of my files are neatly organized in an understandable folder structure easily viewable via any file browser which I have backed up to a second external drive using Grsync.
digiKam First Impressions
This isn't meant to be a review of digiKam as I'm still in the first days of use and I've mostly been focused on the basic metadata features involved with organizing the catalog. I've not even looked at editing images yet. What I can say is that digiKam makes it fairly easy to add metadata with an easy to use and organize keyword/tag system. Metadata such as tags and captions can be added to groups of selected images. A few notes below.
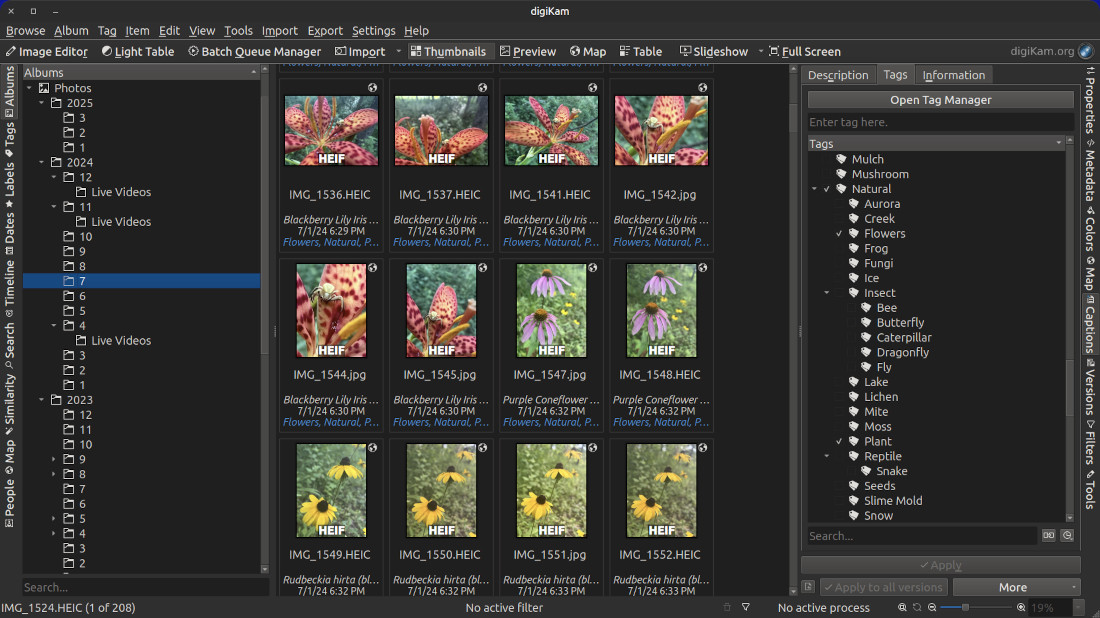
Overview of the application window with the left-side panel showing the albums organized as years>months. The center consists of the image thumbnails and the right-side panel showing nested tags in the tag management tool.
Adding Metadata
As I work through the catalog to add captions and keywords, digiKam is set to write that new metadata to the original media files. Some files already have metadata that had previously been added in Apple Photos. digiKam allows for nested tags which I'm taking advantage of as it makes tagging easier as multiple related tags are all grouped. An example, for a photo of a honey bee I've got Natural>Insect>Bee. Having the groupings also makes for better search as I can look for a specific or a category.
Face Recognition
This was a pleasant surprise that I didn't expect. Just as with Apple Photos the app first detects faces and then the user assigns a name to those faces. After creating a sample of named faces I ran the recognition process and sure enough the app added suggested photos for each person I'd tagged. And it was fairly accurate. Once I scrolled through the suggestions and confirmed for each person I could select all to confirm with one click. The app took care of the rest.
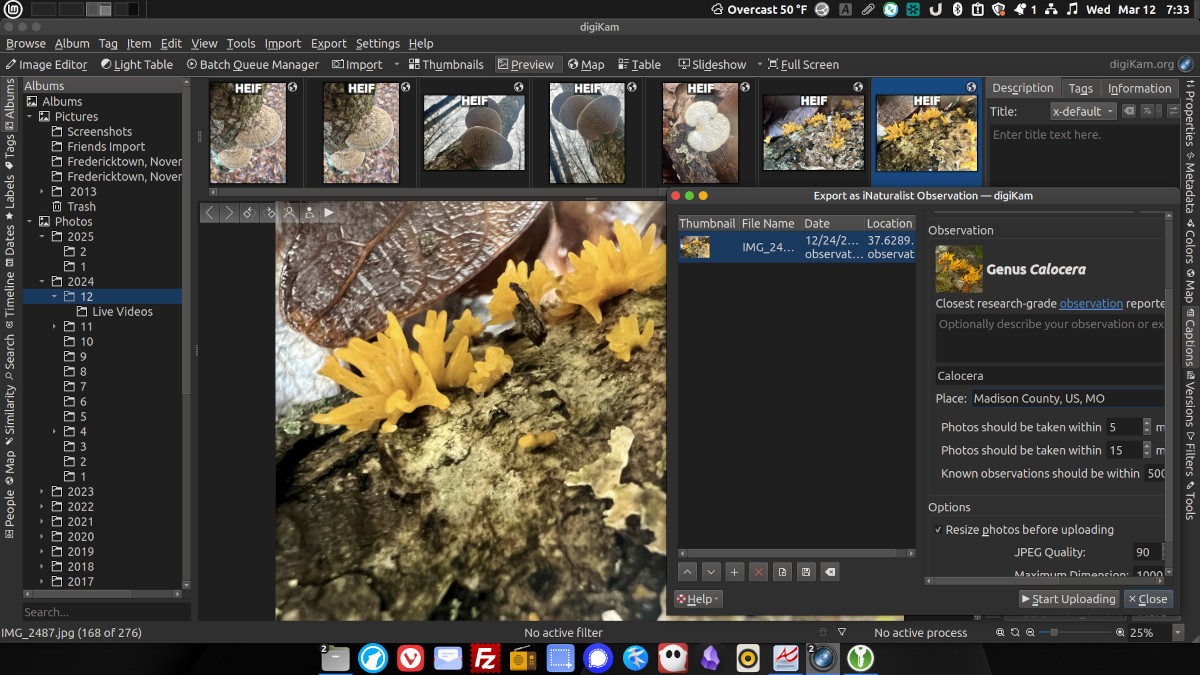
Exporting an image to iNaturalist.
Sharing
The app has built in sharing to a number of services one of which is iNaturalist which I use and am happy to see. As digiKam lacks Apple's built-in machine learning to identify species it will be convenient to be able to upload to iNaturalist which also gives me the ID of things.
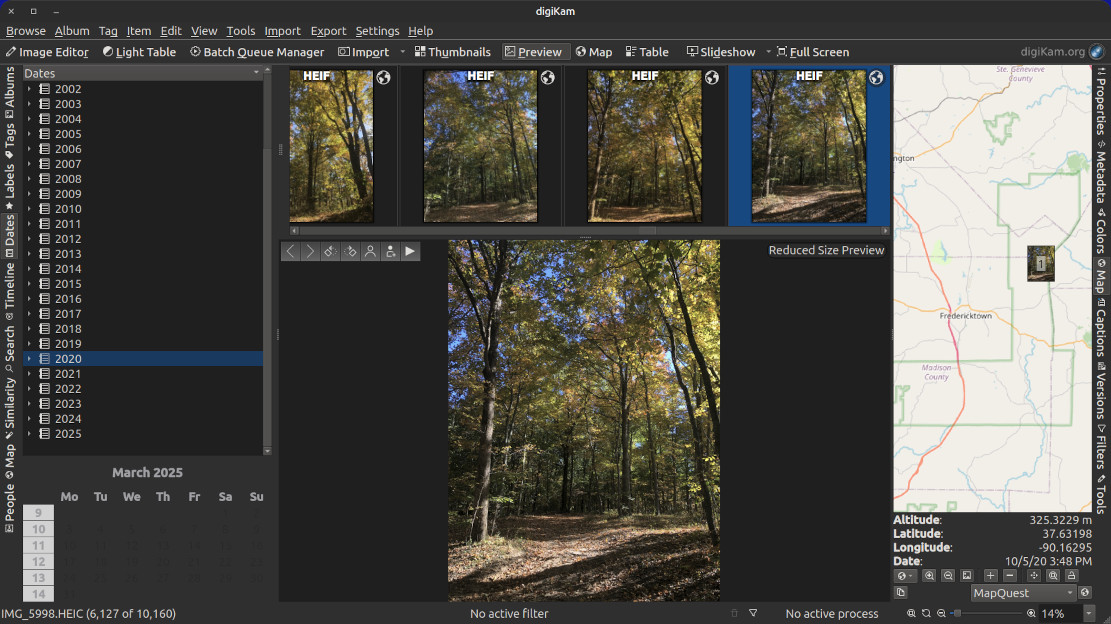
Overview of the application window with the left-side panel with the date-based browser open and the right-side panel showing map location of the current photo.
Navigating/Exploring Images
The left side pane consists of numerous tabs for searching and browsing through images in a variety of ways: dates, tags, faces, locations, faces.
After I've had more time with the app I plan to write a follow-up post. For the moment I'll conclude by saying that while transitioning from Apple Photos to digiKam does mean switching to a different way of managing photos it's not actually new. It's just a return to what I was doing before I moved my photos to iCloud and the Photos app. All the familiar organizational and editing tools are here.
I don't have comments but I love email or you can find me on Mastodon.